Paid partnership with Bluehost. Bluehost paid me to create this tutorial. Every step below comes from my own build, including the mistakes.
I’m Karan Rajput. I’ve spent 7+ years around SEO, WordPress and small web tools, and I built a full portfolio on Bluehost AI Builder to see what the process really looks like.
This tutorial follows that exact build, from the first prompt to the live site. You can start with “$0 to start, no credit card”, so you can follow along without paying.
Here’s the process, plus what I’d do differently next time.
This post contains affiliate links, and I earn a commission from them at no extra cost to you. Thank you for your support!In Short: Write a specific prompt, sign up with Google, Apple, GitHub, or email, let the build finish, then fix everything in one chat message before you hit Publish. On the Free plan, you get 5 credits a day, so batch your edits and check every link before sharing.
Before You Start: What You Need and What It Costs
You need an idea, a few lines of text, and, if you’re showing real projects or services, their exact web addresses. That’s it. No code and no WordPress knowledge, according to Bluehost.
Money-wise, the AI Builder Free plan costs $0 and gives you 5 credits a day, up to 30 a month. One chat message uses one credit. You publish on a Bluehost subdomain, and your own domain needs a paid plan.
My full verdict on the product, including speed tests, is in my Bluehost AI Builder review. This post is only the how-to.
Step 1: Write a Prompt That Works Like a Brief
The prompt box says “Describe it in your own words”, and there’s a plus button for adding a logo, photos, or a site you like. Bluehost says images can be PNG, JPG, or WebP, up to 5 MB each. I didn’t upload any, so I can’t tell you how well that works.
What I did learn: vague prompts get vague sites. I wrote mine like a brief. Here’s the skeleton I’d reuse:
Give every item a full address, a category and a description. My first prompt listed bare domain names, and only one project got a working button. I can’t prove that was the reason, but when I resent the list with full https:// addresses, all five were fixed.
Two lessons from my build:
- Give every item a full address, a category, and a description. My first prompt used bare domain names, and only one project got a working button.
- Only ask for things you’ll check. I asked for a contact form and didn’t get one. More on that below.
Step 2: Create Your Account (Google, Apple, GitHub or Email)
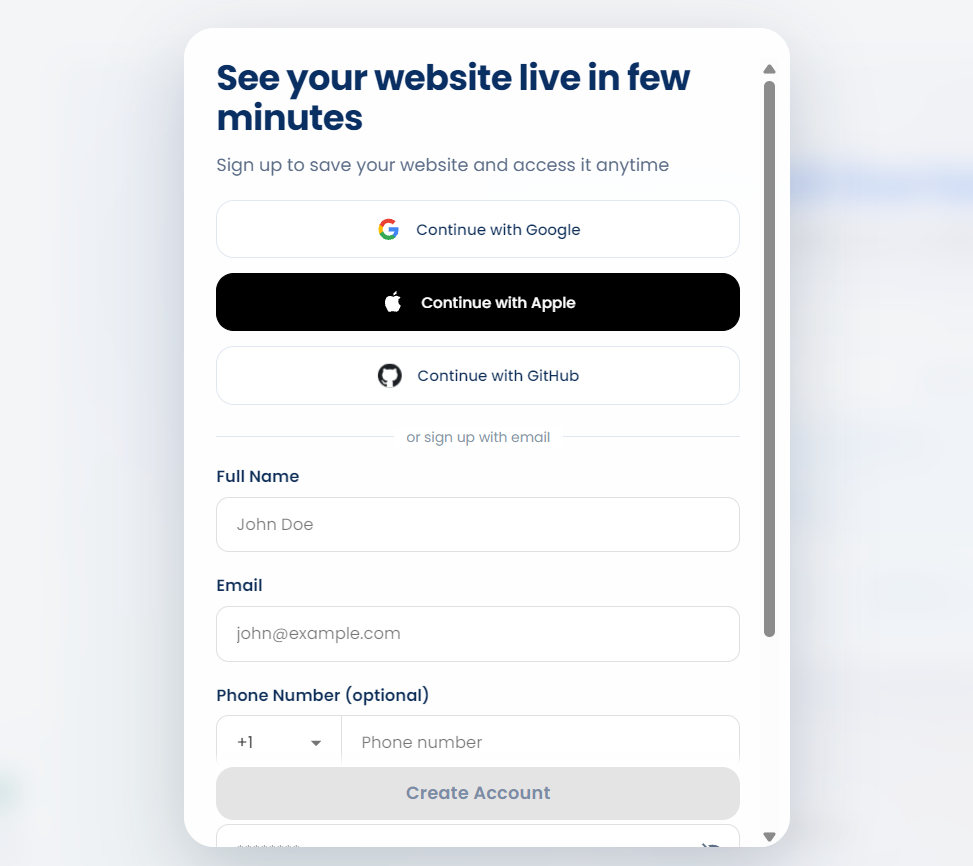
After you click Build for free, a signup box opens. You can continue with Google, Apple or GitHub, or sign up with email. I used email, which means a full name, email address and password. Phone number is optional.
Want to follow the same flow? Start on the Bluehost AI Builder page (I earn a commission).
I wasn’t asked for a credit card at any point.
Step 3: Wait for the Account Screen to Finish
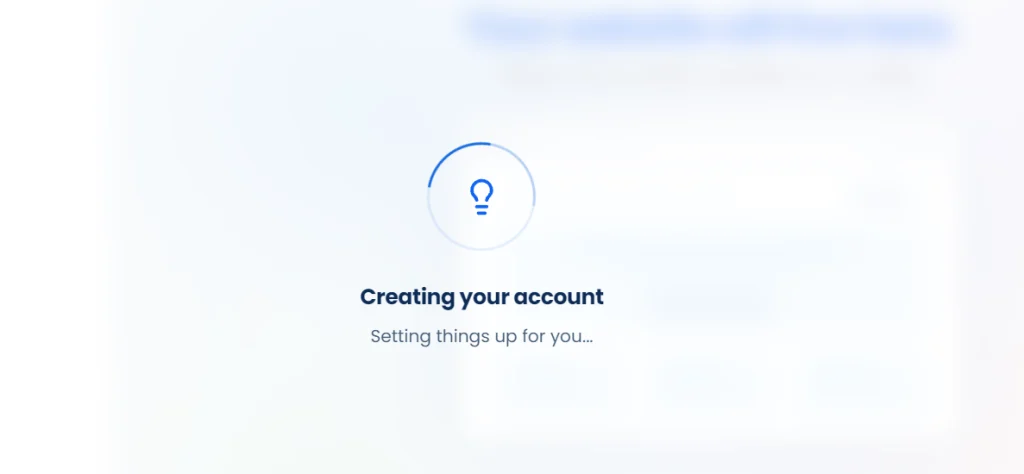
After you click Create Account, you’ll see a short screen saying “Creating your account” and “Setting things up for you…”. Don’t refresh. It moves on by itself.
Step 4: Watch the Build (and Know What’s Normal)
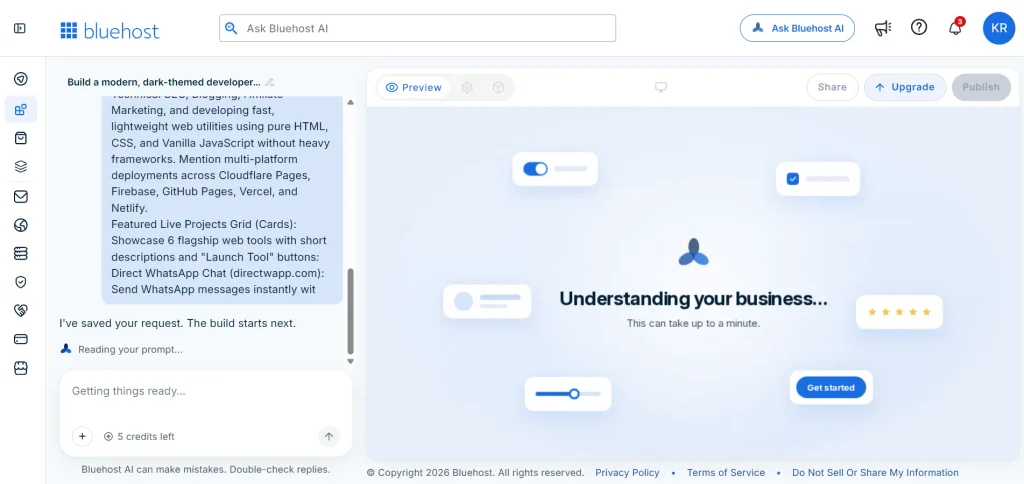
Next comes “Understanding your business…”, with a note that it can take up to a minute. The chat on the left confirms your request is saved. The counter at the bottom of the chat showed 5 credits left for me at this point.
Then the screen switches to “Building your app…” with a progress bar and a checklist. Bluehost’s own screen says this can take a few minutes, and that the build keeps going if you leave. I didn’t time mine, so treat those as Bluehost’s estimates.
While you wait, you’ll see four quick questions, starting with “Which best describes you?” There’s a Skip option. In my build these were profile questions for tips, not design questions.
Step 5: Read the First Version Like an Editor
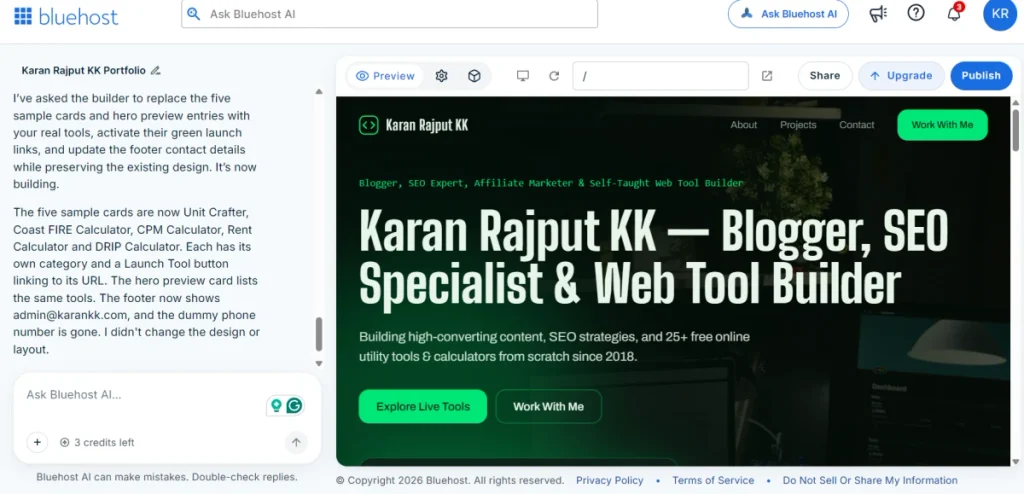
When the build finishes, you get a full preview. Mine looked good straight away: dark green theme, hero, stats bar, About section and a grid of project cards.
Then I read it properly, and found:
- Five cards labelled “(sample)” with “Coming soon” instead of my real tools.
- A dummy phone number and an example email in the footer.
- No contact form, even though I’d asked for one.
My checklist for this step:
- Read every heading and card.
- Look for words like “sample” or “example”.
- Check the footer for contact details.
- Compare the page against your prompt, section by section.
The chat box says “Bluehost AI can make mistakes. Double-check replies.” Believe it.
Step 6: Fix Everything in One Chat Message
Here’s the move that saved me credits. I sent one message that listed all five real tools, each with a category, a description and the full address. In the same message I asked it to replace the dummy phone number and example email.
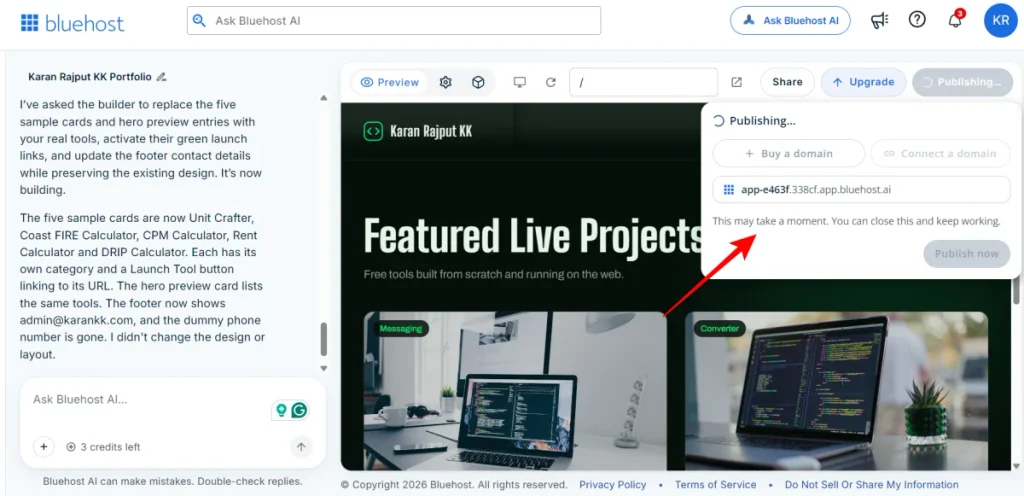
The builder replied that the five sample cards were now Unit Crafter, Coast FIRE Calculator, CPM Calculator, Rent Calculator and DRIP Calculator, each with its own category and Launch Tool button. It said it hadn’t changed the design or layout. My counter dropped from 4 to 3.
Rule of thumb: one message, one credit, so put every change in the same message.
Step 7: Check the Site on Your Phone
Bluehost says you can review desktop, tablet and mobile views. I didn’t use the device switcher. Instead I opened the live address on my phone, which is the check that matters most. I didn’t check a tablet.
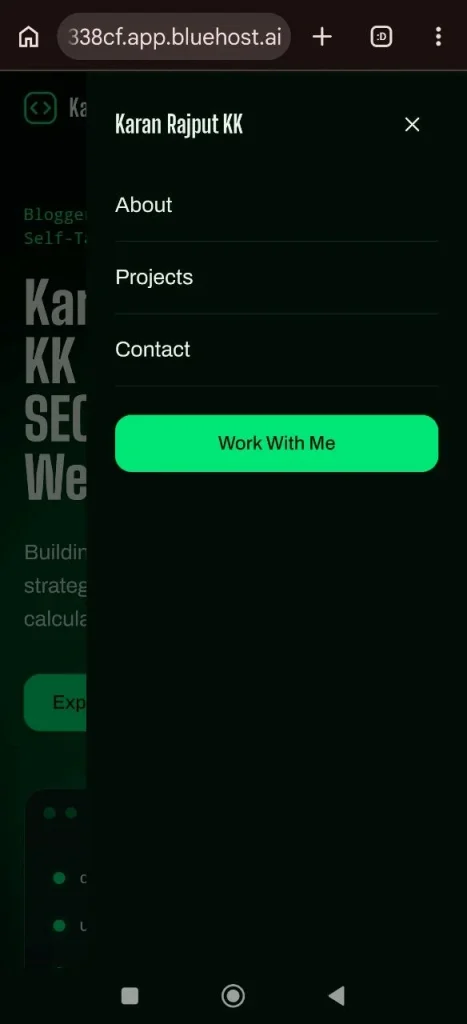
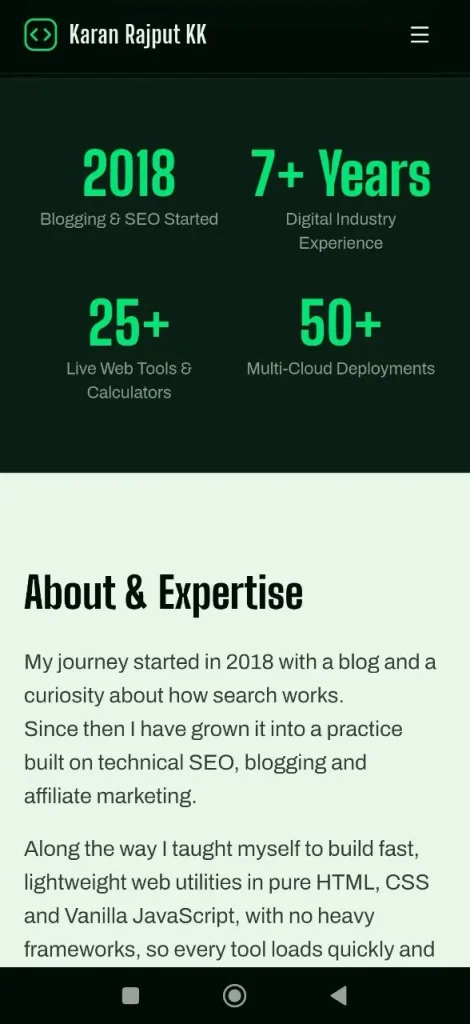
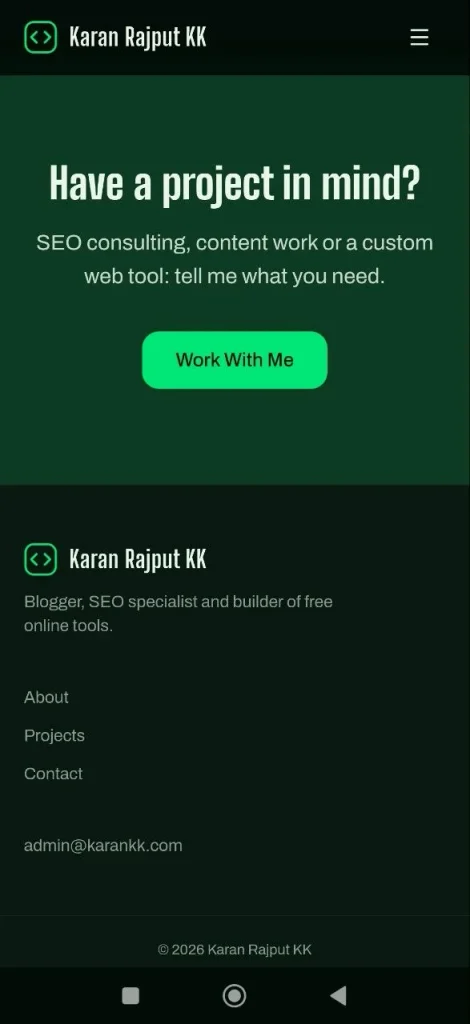
What I saw: the layout stacks into one column and the menu collapses into a hamburger icon. Opening it shows About, Projects, Contact and a Work With Me button. The stats bar and About section stay readable.
Step 8: Publish It and Know What You’re Getting
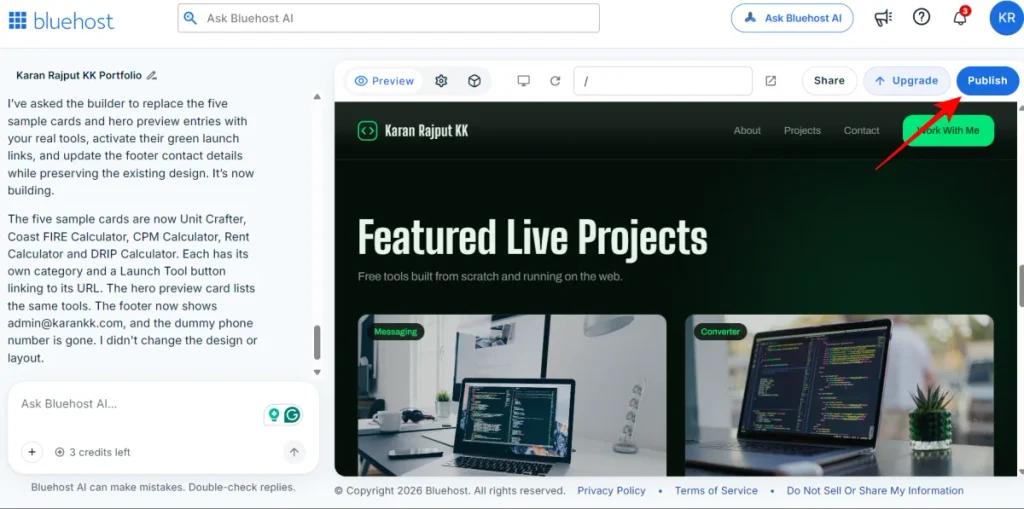
Click Publish at the top right. A small panel opens with “Not published”, two buttons (Buy a domain and Connect a domain) and a ready-made address. Click Publish now.
A “Publishing…” message says it may take a moment, and that you can close it and keep working. When it’s done, the panel shows “Published”, with Open site and Publish changes buttons.
My address was app-e463f.338cf.app.bluehost.ai. It’s assigned automatically, and I found no way to rename it. Your own domain needs a paid plan, and registering or renewing a domain is billed separately.
Step 9: Run the Checks Most Guides Skip
Publishing isn’t the finish line. Here’s what I’d do next:
- Click every Launch Tool button. One broken link looks worse than no link.
- Scroll to the footer on your phone. Make sure the contact details are real.
- Run PageSpeed Insights. Mine scored 99 on desktop and 87 on mobile for performance.
- Read the SEO section. Mine scored 66 on both, because the report flagged the page as blocked from indexing through a noindex, nofollow header. I don’t know why it’s set, and the details are in my full review.
How I’d Spend 5 Credits in One Day
This is my plan, not something I tested to the limit. My own build used 2 credits.
| Credit | What I’d use it for |
|---|---|
| 1 | The first build, with a detailed prompt |
| 2 | One big fix message covering every error you found |
| 3 | A design or wording change you really want |
| 4 | A second round of fixes after checking the live links |
| 5 | Keep it spare for the day |
Free plan credits are capped at 30 a month. If you plan to edit a lot, count your messages before you start.
Where This Process Can Go Wrong
- Placeholder content. In my build, the AI filled gaps with “sample” items. Read everything.
- Missing features. I asked for a contact form and got a button plus an email address. Check each feature you asked for.
- A fixed address. The free subdomain was automatic in my build.
- Wrong expectations. AI Builder doesn’t support e-commerce yet. If you want to sell products, Bluehost points you to Bluehost AI Store (I earn a commission). Native apps for the Apple App Store or Google Play aren’t supported at this time.
When It Makes Sense to Pay
For this tutorial, Free was enough. Paid plans from $20/mo make sense in two cases:
- You want your own domain. AI Builder Lite is $20/mo, billed monthly. It lists custom domains, removing the Bluehost badge, on-demand credit top-ups and up to 100 credits per month with no limit on daily usage.
- You edit a lot. AI Builder Standard is $40/mo for 200 credits a month, with everything in Lite.
I haven’t tested any paid plan. Pricing may change, so check Bluehost’s official page before you buy.

Bluehost AI Builder — Free Plan
Price: “$0 to start, no credit card” (paid plans from $20/mo)
Describe your website in your own words, refine it by chatting and publish live on a Bluehost subdomain. Hosting included on every plan.
Disclosure: I earn a commission.
Frequently Asked Questions
How long does a Bluehost AI Builder build take?
Bluehost’s screens say “up to a minute” for the first step and “a few minutes” for the build. I didn’t time mine, so treat those as Bluehost’s estimates. The build keeps running if you leave the page, according to the same screen.
Do I need to know how to code?
Bluehost says no WordPress knowledge is needed, and I didn’t write any code during this build. Everything was done through the prompt and one chat edit. I still read the generated content carefully because the AI can make mistakes.
Can I upload my logo or photos?
Bluehost says you can add a logo, photos or a site you like, as PNG, JPG or WebP files up to 5 MB each. I didn’t use this feature in my build, so I can’t comment on how well it matches your brand.
Can I edit the site after publishing?
Bluehost says you can change design, copy, images or layout in the same conversation and review updates before publishing again. I made my edit before publishing, so I haven’t tested editing a live site.
How much does it cost to follow this tutorial?
Nothing. The AI Builder Free plan is “$0 to start, no credit card”, with 5 credits a day, up to 30 a month. You publish on a Bluehost subdomain. Paid plans from $20/mo add custom domains and more credits.
Can I use my own domain?
Not on the Free plan. Connecting your own domain needs Lite or a higher paid plan. Registering or renewing a domain is billed separately from the plan. My test site got an automatic address that I couldn’t rename.
Final Verdict
The process is simple: a detailed prompt, an account, one build, one batched fix and a publish. The skill is in reading the first version critically and checking every link before you share the address.
For a portfolio, a landing page or a quick web app idea, the free plan is a fair place to practise. Selling products or shipping a native app? Look elsewhere.
Ready to try it? Start from Bluehost AI Builder (I earn a commission), and keep your prompt specific.
Related Posts