Starting a blog may be a fun and rewarding experience. It offers a platform to share your thoughts, show your creativity, and meet with people around the world.
However, for beginners, the process of starting a blog can be overwhelming and confusing.
In this post, we’ll give you a thorough overview of how to start a blog from scratch, along with all the information you need on SEO and how to produce material that appeals to readers.
Step 1: Choose a niche and identify your target audience
The first step to starting a blog is to choose a niche, which is a specific topic or area of interest that you will be writing about.
It’s critical to select a topic that you are informed and excited about since this will enable you to produce engaging content for your audience.
Once you’ve chosen a niche, it’s essential to identify your target audience.
Understanding your target audience will help you tailor your content to their preferences and create a loyal readership.
For “How to choose a niche for your blog”, go to the post given below. In this post, you have been guided step by step.
Step 2: Choose a blogging platform
The next step is to choose a blogging platform, which is the software that you will use to create and manage your blog.
There are many blogging platforms available, including WordPress, Blogger, Wix, Squarespace, and more.
We recommend WordPress, as it’s the most popular and versatile platform with a vast community of developers and users.
WordPress is free to use and easy to customize, making it an excellent choice for beginners.
For “How to choose a blogging platform”, go to the post given below. In this post, you have been guided step by step.
Step 3: Choose a domain name and hosting provider
A domain name is the web address of your blog, such as www.karankk.com.
It’s essential to choose a domain name that is memorable, easy to spell, and reflects your niche and brand.
For “How to choose the perfect domain name”, go to the post given below. In this post, you have been guided step by step.
Once you’ve chosen a domain name, you need to choose a hosting provider, which is the service that stores your blog’s files and makes them accessible to the internet.
We recommend it Hostinger, as it’s an affordable and reliable hosting provider that’s optimized for WordPress.
Hostinger web hosting provider
Hostinger is a web hosting provider that offers affordable hosting solutions with an easy-to-use interface. Here, we will guide you on how to sign up with Hostinger and choose the perfect domain name. We will also discuss the pros and cons of using Hostinger and answer some frequently asked questions.

Hostinger Discount
How to Sign up with Hostinger
Signing up with Hostinger is a straightforward process. Follow these simple steps to get started:
- Step 1: Go to the Hostinger website
To sign up with Hostinger, go to their website https://www.hostinger.com/.
- Step 2: Choose a hosting plan
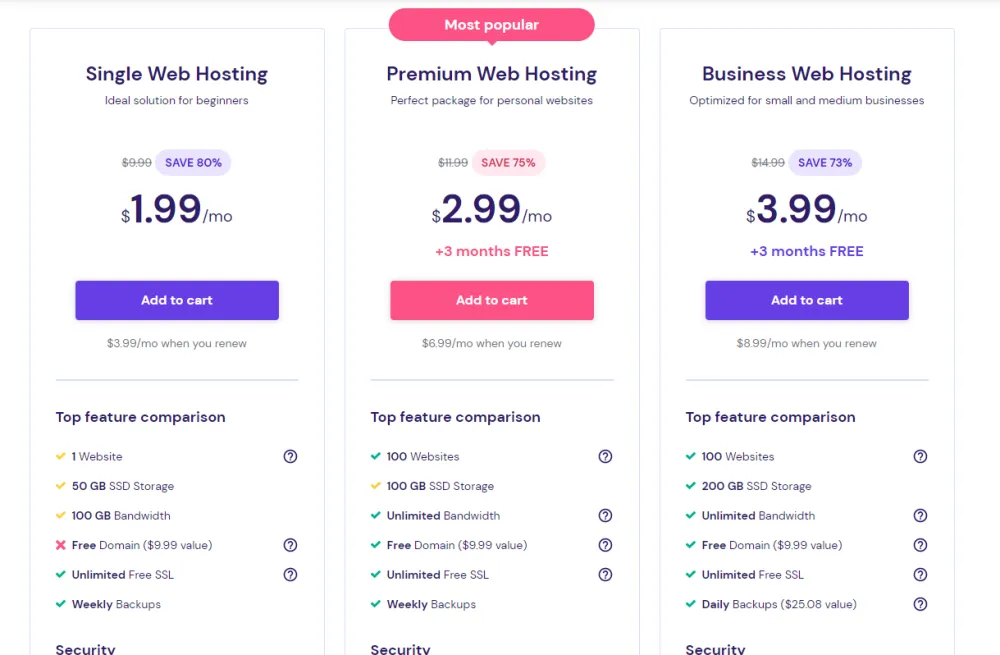
Hostinger offers various hosting plans, including shared hosting, VPS hosting, cloud hosting, and WordPress hosting. Choose the hosting plan that suits your requirements and budget.
- Step 3: Choose a domain name
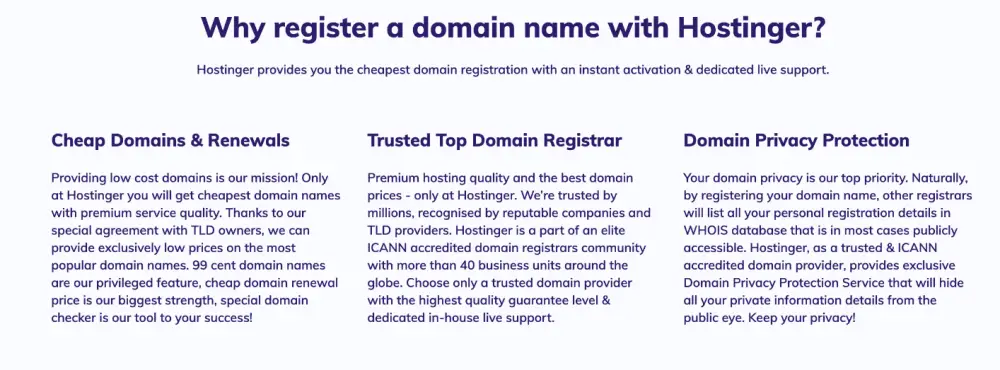
Next, you need to choose a domain name. Hostinger offers a free domain name with most of its hosting plans. You can also register a new domain name or transfer your existing domain name to Hostinger.
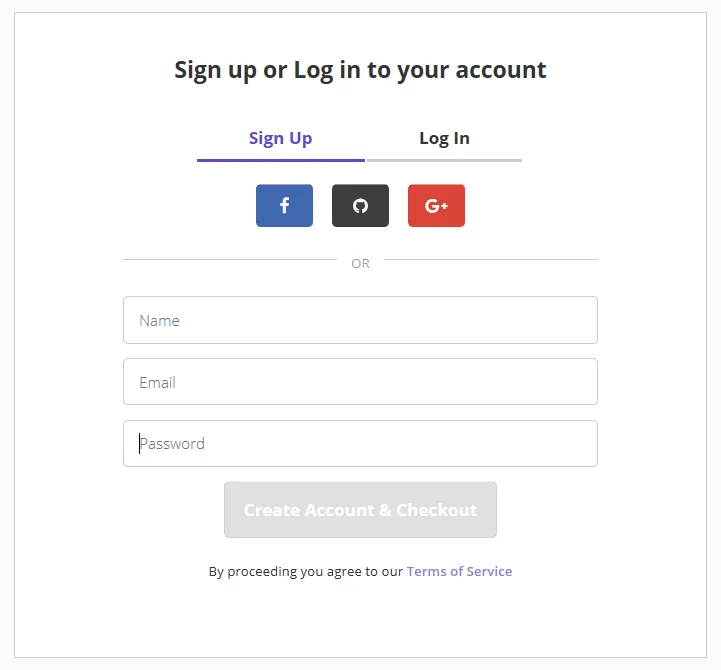
- Step 4: Complete the registration process
Once you have chosen a hosting plan and domain name, you need to complete the registration process. Provide your personal and billing information, choose a payment method, and complete the registration process.
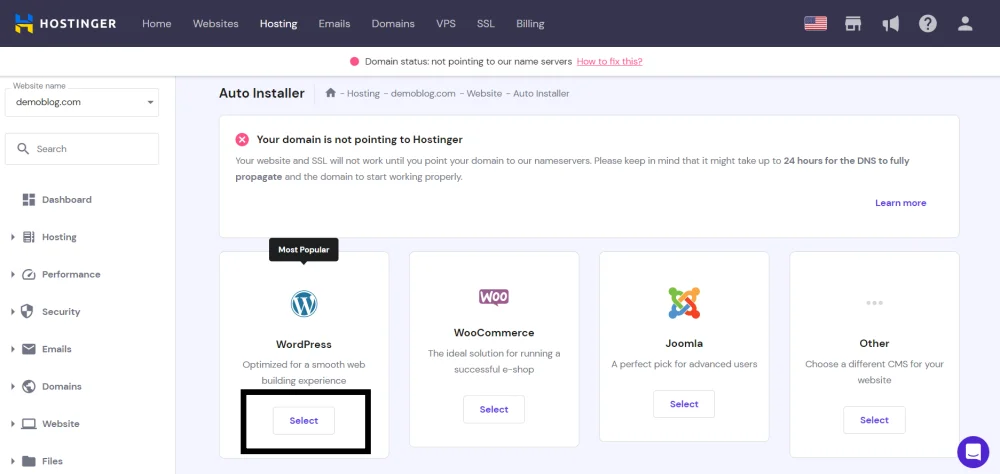
- Step 5: Install and set up your website
After completing the registration process, you can install and set up your website. Hostinger offers a user-friendly interface and a one-click installer that allows you to install popular CMS platforms like WordPress, Joomla, and Drupal easily.
Pros of Using Hostinger
Pros
- Affordable Pricing: Hostinger offers one of the most affordable hosting solutions in the market. Their basic shared hosting plan starts at just $1.99 per month, which is significantly lower than most other hosting providers.
- User-Friendly Interface: Hostinger’s interface is designed to be user-friendly and intuitive, making it easy for even beginners to navigate and manage their website.
- Free Domain Name: Hostinger offers a free domain name with most of their hosting plans, saving you the cost of buying a domain name separately.
- Fast and Reliable Servers: Hostinger uses state-of-the-art servers that are fast and reliable, ensuring your website loads quickly and is always available.
- 24/7 Customer Support: Hostinger provides 24/7 customer support through live chat, email, and phone, ensuring that you can get help whenever you need it.
Cons
- Limited Features: Hostinger’s basic plans have limited features compared to their more expensive plans.
- No Traditional cPanel: Hostinger does not use the traditional cPanel that most other hosting providers use. Instead, they have a custom-built control panel that can be confusing for users who are used to the traditional cPanel.
Hostinger FAQ:
Q: What is Hostinger?
A: Hostinger is a web hosting provider that offers affordable hosting solutions with an easy-to-use interface.
Q: How much does Hostinger cost?
A: Hostinger’s basic shared hosting plan starts at just $1.99 per month, making it one of the most affordable hosting solutions in the market.
Q: Which hosting do I use?
A: If you want to know which hosting I use, then my answer is Hostinger. I host all my websites on Hostinger.
Read the post given below to “buy hosting from Hostinger and setup”. In this post, you have been given step-by-step all the information. Which will help you in creating a new blog.
After buy hosting, you need to install WordPress. For “How to install WordPress“, go to the post given below. In this post, you have been guided step by step.
After installing WordPress, you need a good theme for your website. I would always recommend the GeneratePress premium theme to you.
This theme is very beneficial for your website’s speed and SEO.
For “How to install GeneratePress Premium“, go to the post given below. In this post, you have been guided step by step.
Step 4: Customize your blog’s design and layout
Once your blog is up and running, it’s time to make it more visually beautiful and user-friendly by customizing its style and layout.
You can choose from a wide range of WordPress themes that offer different styles, colors, and layouts.
We recommend choosing a theme that’s responsive, meaning it adapts to different screen sizes, and has a clean and simple design that’s easy to navigate.
You can customize your theme by adding your logo, changing the colors, and rearranging the layout.
I cannot give you much information on this topic because everyone’s thinking is different. The design I like is not necessarily that you will also like it.
That’s why you have to design your website according to your needs.
Now let’s go to the next point.
Step 5: Install essential plugins and tools
Plugins are small software programs that you can install on your WordPress blog to enhance its functionality and features.
There are thousands of WordPress plugins available, but some essential ones that you should install are:
For “Install Essential Plugins”, go to the post given below. In this post, you have been guided step by step.
Step 6: Create high-quality and engaging content
Now that your blog is set up and it’s time to start a blog post.
Your content should be high-quality, engaging, and valuable to your readers.
You can create hundreds of content kinds, including podcasts, videos, infographics, blog articles, etc.
It’s essential to create a content strategy that outlines the topics you will cover, the frequency of your posts, and the format of your content.
Your writing should be carefully researched, educational, and of use to the audience you are targeting.
For “Create High-Quality and Engaging Content”, go to the post given below. In this post, you have been guided step by step.
Step 7: Optimize your content for SEO
Search engine optimization (SEO) is the process of optimizing your website’s content and structure to rank higher on search engine results pages (SERPs).
SEO is essential for driving organic traffic to your blog and building a readership.
Some essential SEO practices that you should implement are:
You will need a tool to do keyword research. In the post given below, you have been given complete information about paid and free keyword research tools.
For “How to Optimize Your Content for SEO”, go to the post given below. In this post, you have been guided step by step.
Step 8: Promote your blog and build a readership
Promoting your blog is essential for building a readership and increasing your website’s traffic.
You can use different methods to promote your blog such as:
Step 9: Monetize your blog and earn income
Once your blog has established a readership, you can start monetizing it and earning income.
Some common ways to monetize your blog are:
For “How to Monetize Your Blog and Earn Money”, go to the post given below. In this post, you have been guided step by step.
Conclusion
Starting a blog can be a fulfilling and rewarding journey. You can start a profitable blog that links you with like-minded individuals and advances your objectives if you have the correct tools, information, and mentality.
You’ll be well on your way to developing a unique, high-quality blog if you stick to the guidance provided in this article.
Start a Blog and Make Money Online ( Free Full Guide )
- How to Start a Blog
- How to Choose a Niche
- How to Choose a Blogging Platform
- How to Choose the Perfect Domain Name
- How to Choose a Domain Name for a Personal Website
- How to Sign Up with Hostinger
- How to install WordPress in Hostinger
- How to Install GeneratePress Premium
- How to Install Essential Plugins
- Best Keyword Research Tool
- Create High-Quality and Engaging Content
- How to Optimize Your Content for SEO
- How to Monetize Your Blog
- How to Promote Your Blog
FAQs
Do I need to have technical skills to start a blog?
No, you don’t need to have technical skills to start a blog. It is simple to start and manage your blog thanks to the user-friendly interfaces and drag-and-drop capabilities offered by many blogging systems.
How often should I post on my blog?
The frequency of your blog posts depends on your content strategy and availability. However, it’s essential to maintain consistency and post on a regular schedule to keep your readers engaged.
Can I change my blog’s niche later?
Yes, you can change your blog’s niche later if you decide to focus on a different topic. However, it’s essential to make the change gradually and inform your readers of the change to avoid confusion.
How long does it take to make money from a blog?
It can take several months or even years to start earning a significant income from your blog. It depends on various factors such as your niche, traffic, monetization strategy, and marketing efforts.
What are some common mistakes to avoid when starting a blog?
Some common mistakes to avoid when starting a blog are:
1. Choosing a niche that you’re not passionate about or knowledgeable in.
2. Focusing too much on monetization and neglecting your content quality and readers’ needs.
3. Neglecting SEO and not optimizing your content for search engines.
4. Ignoring social media and other promotion methods.
5. Giving up too soon and not being patient with the process.


